To ensure that the WebsitePolicies cookie consent banner effectively manages user consent across your website, it can be integrated with Google Tag Manager (GTM).
GTM allows you to control when and how scripts and tags, such as analytics and advertising pixels, are fired based on the user’s consent preferences.
This integration is necessary for compliance with some of Google’s services such as Google Ads or Google AdSense.
Add the Cookie Consent Banner to GTM
Integrating the consent banner with GTM involves importing a template into your GTM workspace and setting up triggers that respond to user consent. This setup will ensure that tags are fired or blocked based on the preferences users set through the consent banner.
Access Your GTM Workspace
Log in to your Google Tag Manager account and select the container for your website.
Add the WebsitePolicies CMP Template
Download the consent banner template for Google Tag Manager.
In your GTM workspace, navigate to the “Templates” section in the left-hand menu.
Click on “New” and then the “Import” button inside the “dotted” button in the top-right corner and select the template you downloaded.
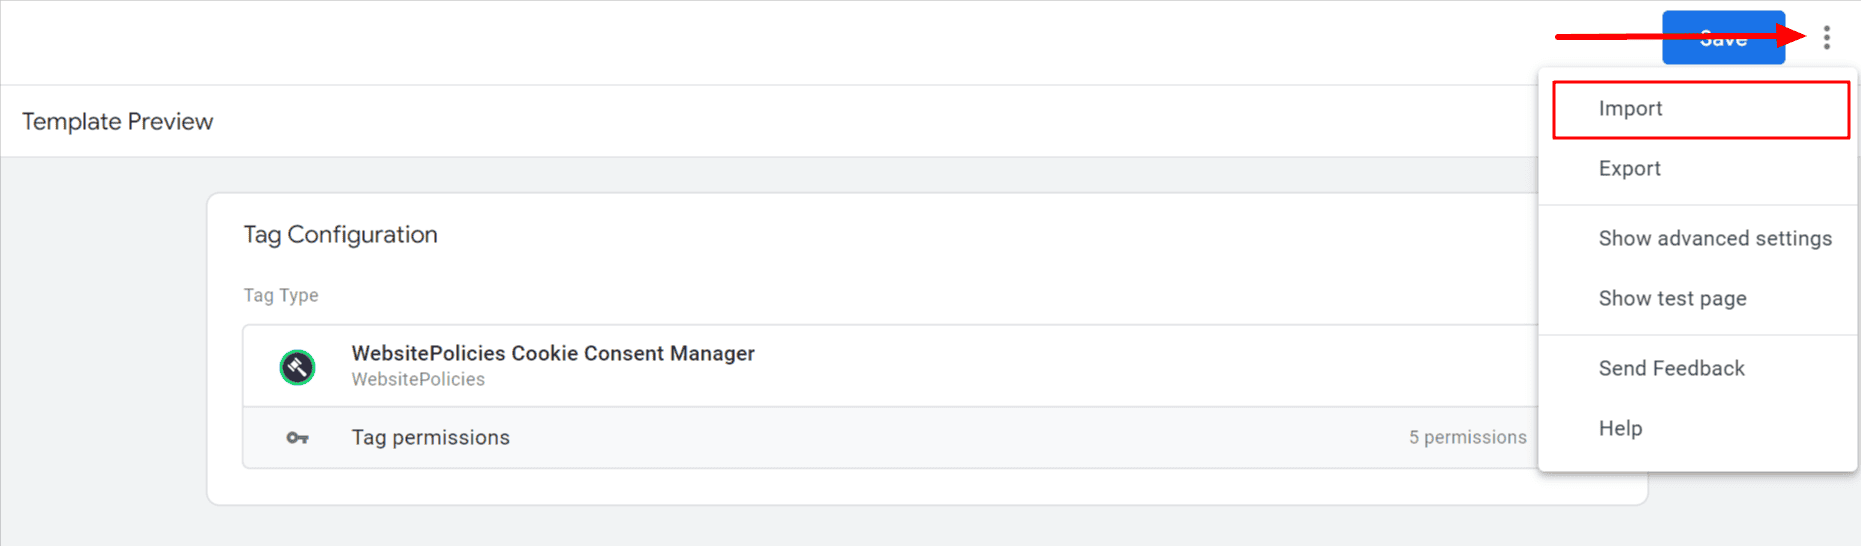
Accept Google’s “Community Template Gallery Terms of Service” and click on the “Save” button to save it in your workspace.
Set Up the CMP Tag
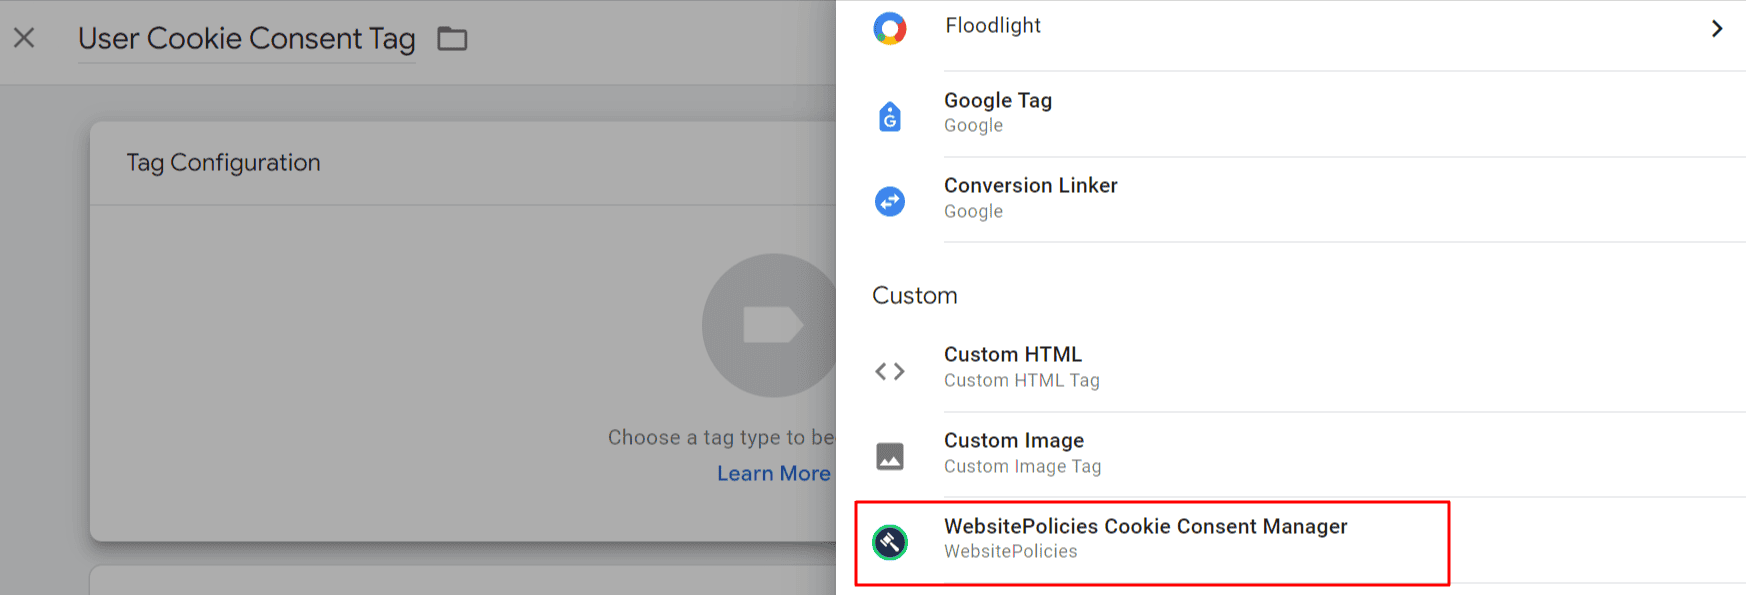
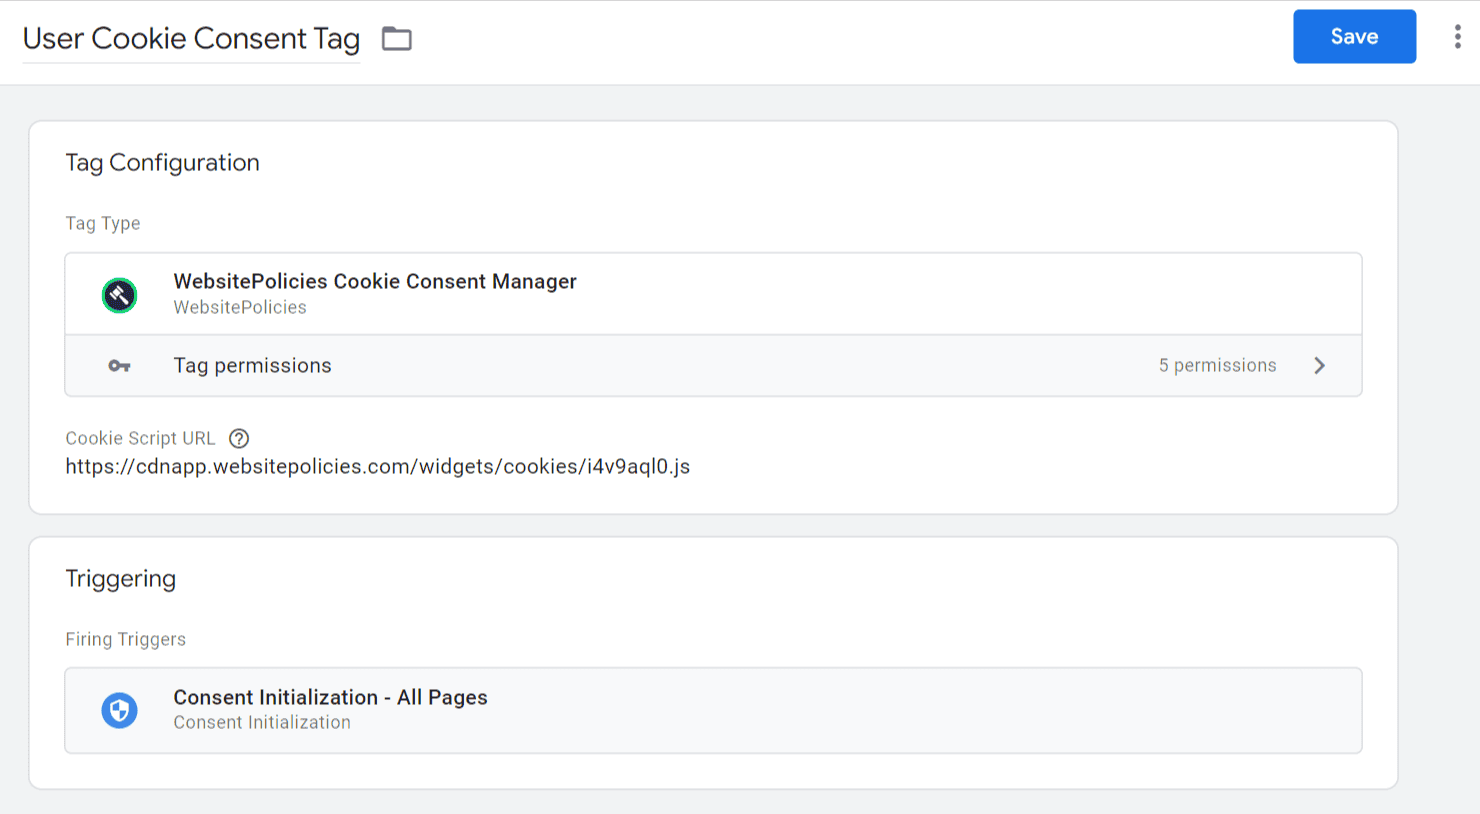
Go to the “Tags” section and create a new tag.
Select the “WebsitePolicies Cookie Consent Manager” template you just added.
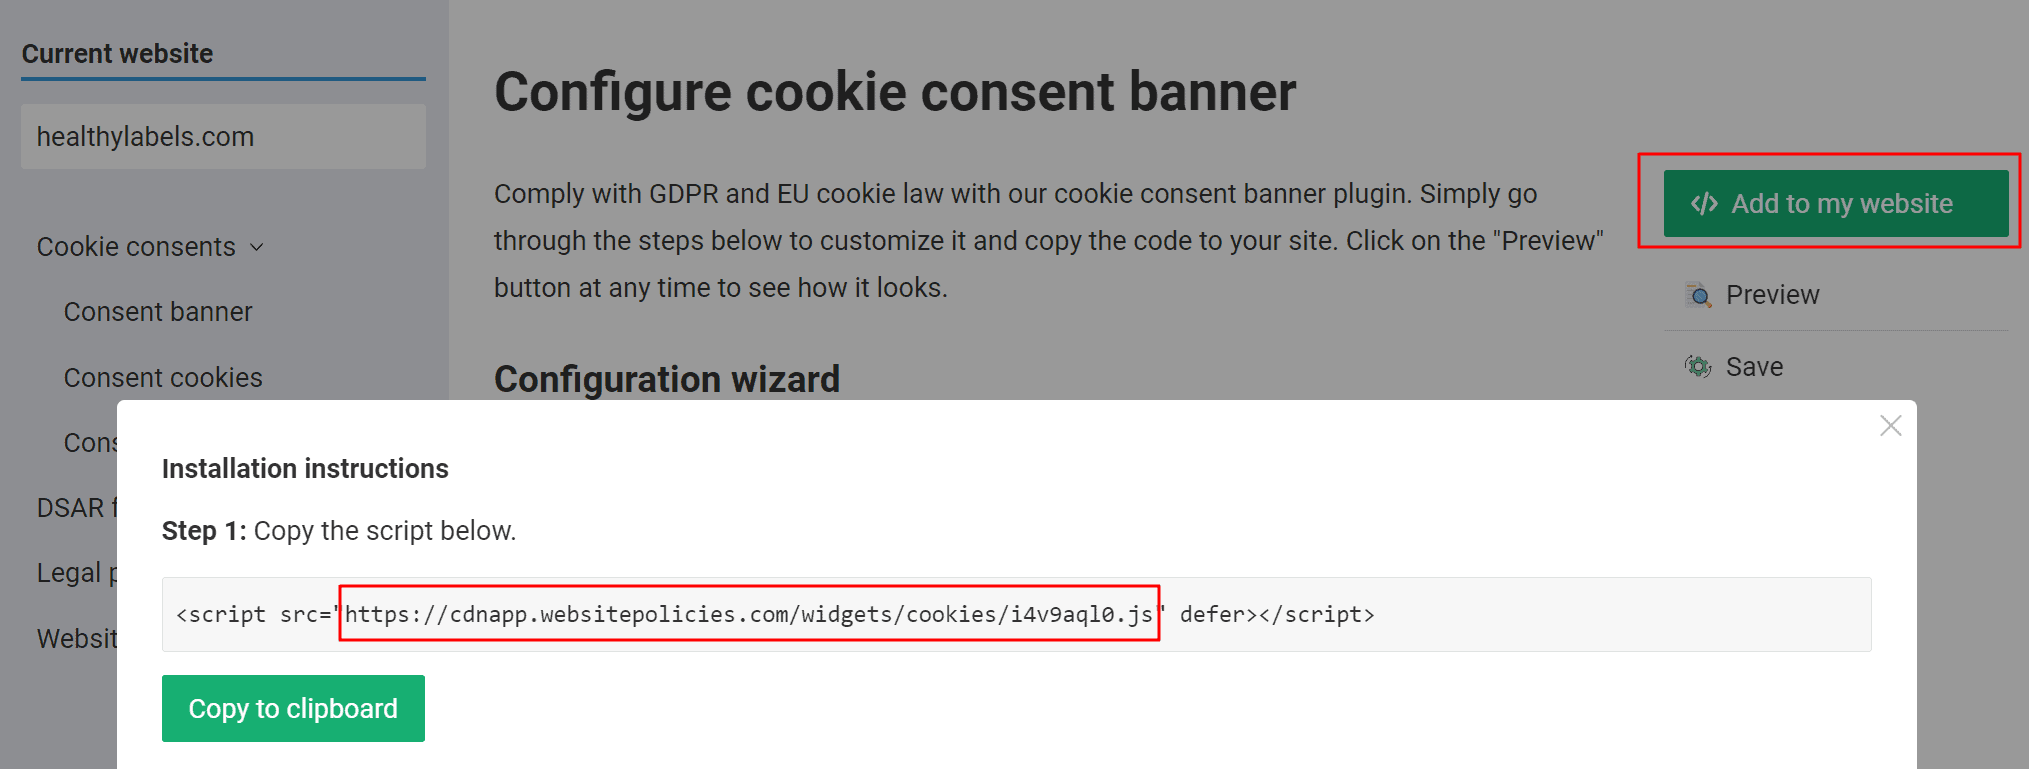
In the “Cookie Script URL”, fill in the URL of your cookie consent banner.
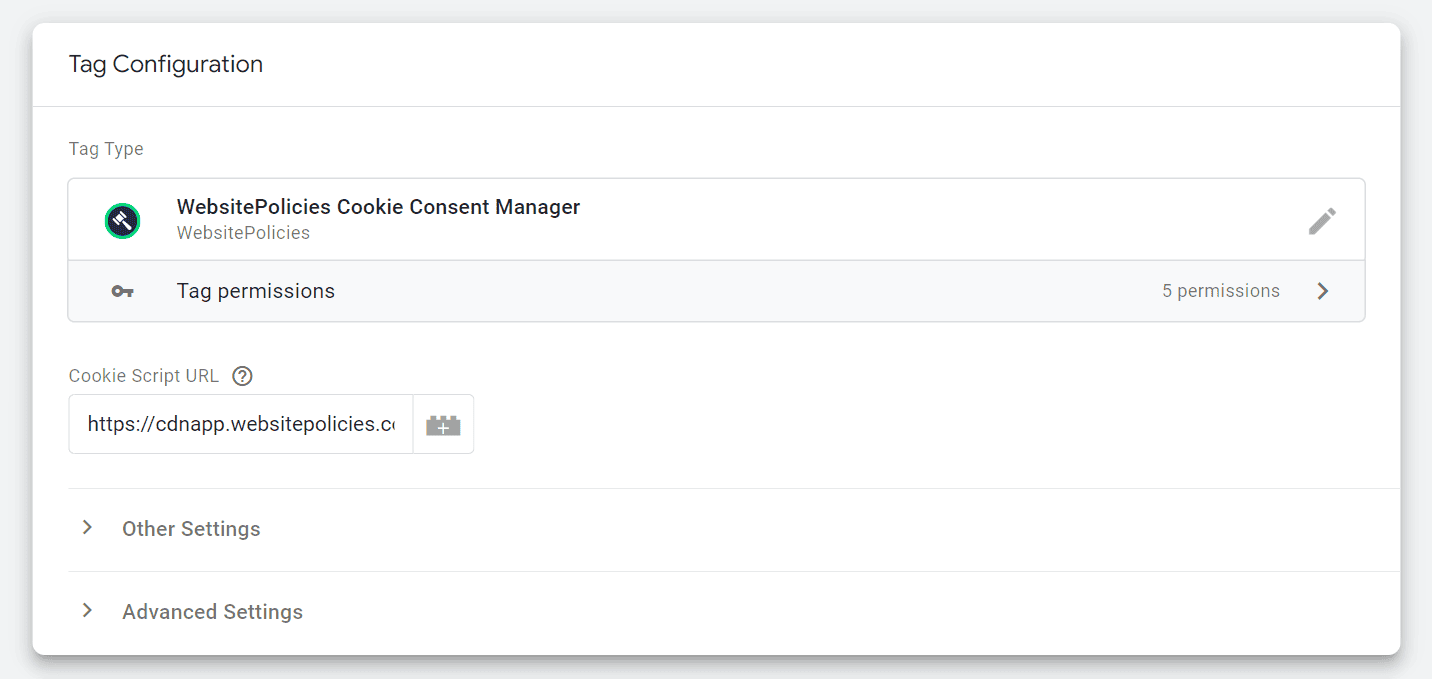
You may find it in your WebsitePolicies account under “Cookie banner => Cookie consents => Add to my website” button.
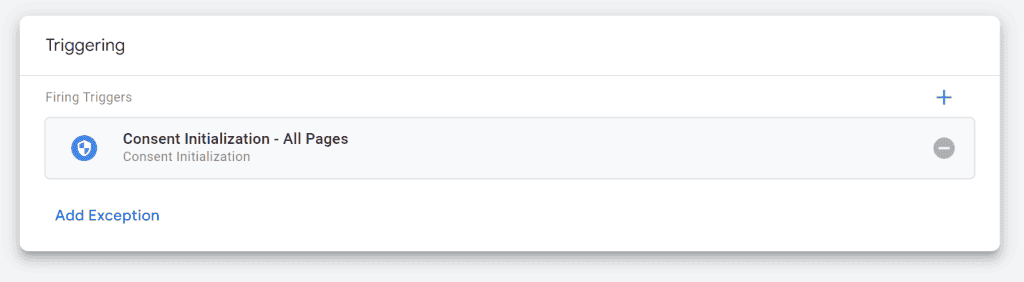
Under “Triggering,” add the “Consent Initialization – All Pages” trigger.
Enter the name for your tag and save your changes. Your final tag should look like this:
Configure the Consent Initialization Trigger
After configuring the tag, go to the “Triggers” section and create a new “Event” trigger with the “Event name” set to “wpcc_consent_update”.
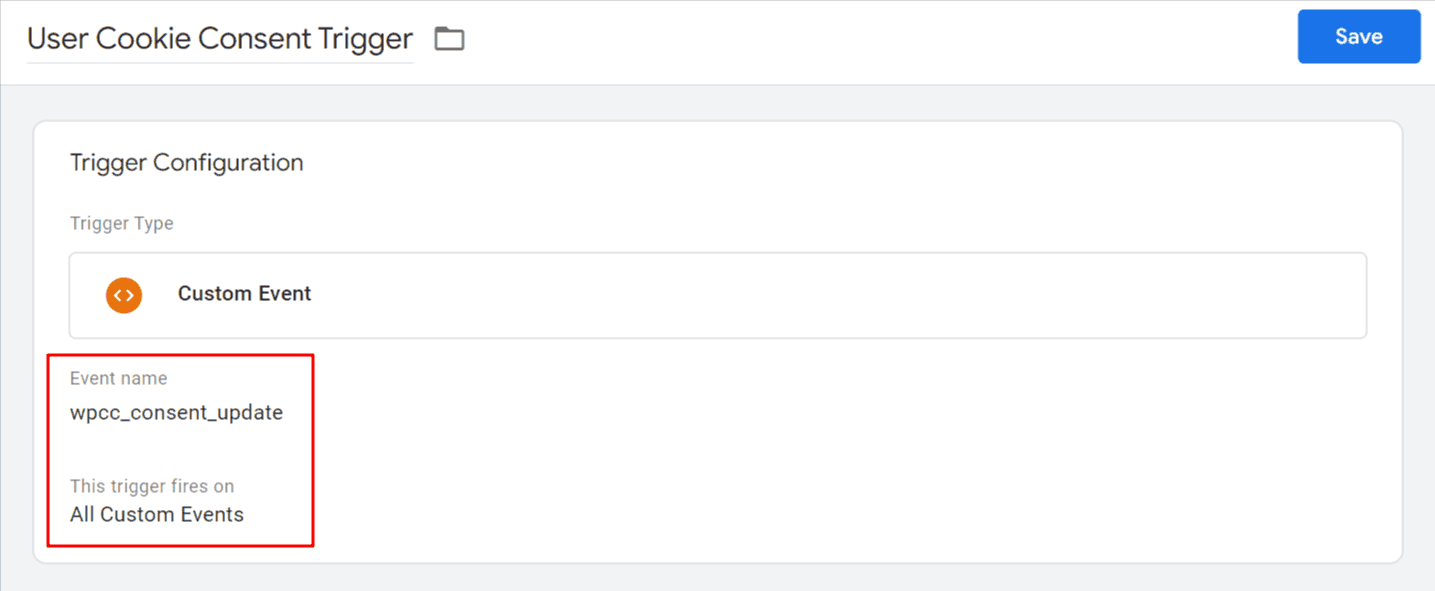
Enter the name of your trigger and save the changes.
Configure Tags to Comply With Cookie Consent
Google Tag Manager’s Consent Mode is designed to adjust the behavior of tags based on the consent state communicated by your WebsitePolicies cookie consent banner.
Configure Tags Based on Built-in User Consent Checks
To ensure that your tags align with the user’s consent preferences, GTM offers built-in user consent checks. These checks allow you to configure your tags so that they only fire when the user has given the necessary consent. This method is particularly effective for tags that are directly linked to Google’s ecosystem, such as Google Analytics and Google Ads.
Review the tags within your GTM container and identify those that require user consent before they can fire (e.g., tags related to analytics, marketing, or personalization).
For each tag, navigate to the tag configuration screen and look for the “Consent Settings” section.
Tags with built-in consent checks will have them listed under the relevant section. Simply check the “No additional consent required” option and save the tag.
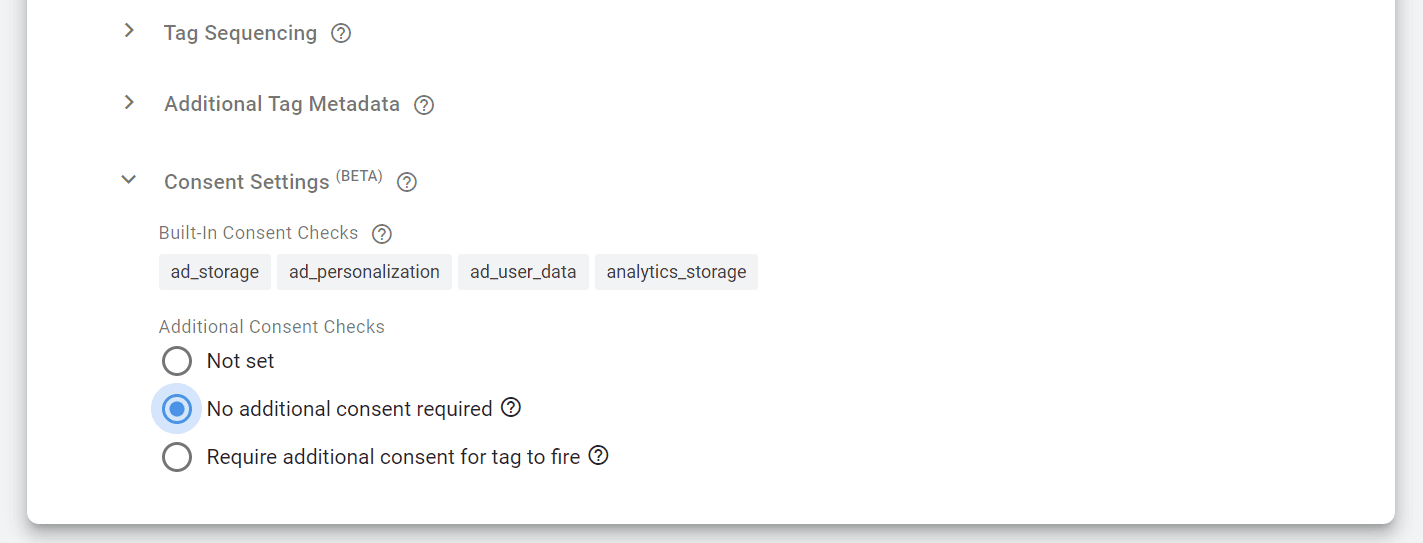
From now on, this tag will fire only if a user has given the appropriate consent through the WebsitePolicies cookie consent banner.
Configure Tags Based on Event Triggers for Dynamic Consent Handling
For tags that do not have built-in consent checks in GTM, you can use a custom event trigger to manage their firing based on user consent. The “wpcc_consent_update” event trigger we created earlier is specifically designed for this purpose.
It is triggered whenever a user updates their consent preferences through the WebsitePolicies cookie consent banner. By linking this event to your tags, you ensure that these tags only fire when the appropriate user consent has been granted.
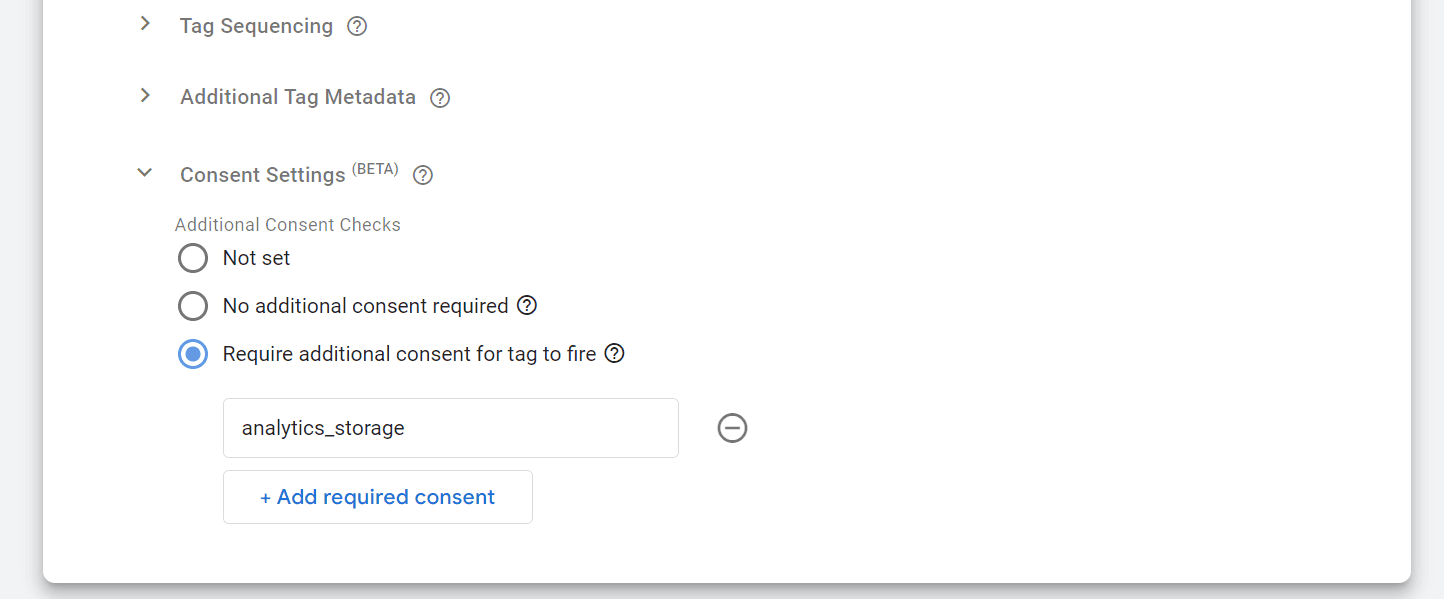
Similarly to the above, review the tags within your GTM container and identify those that require user consent before they can fire but don’t have built-in consent checks.
In the tag configuration, under the “Consent Settings”, check “Require additional consent for tag to fire” and fill in the consent types you want to check for.
GTM supports different default consent types. WebsitePolicies cookie consent banner maps these Google consent types into the following categories:
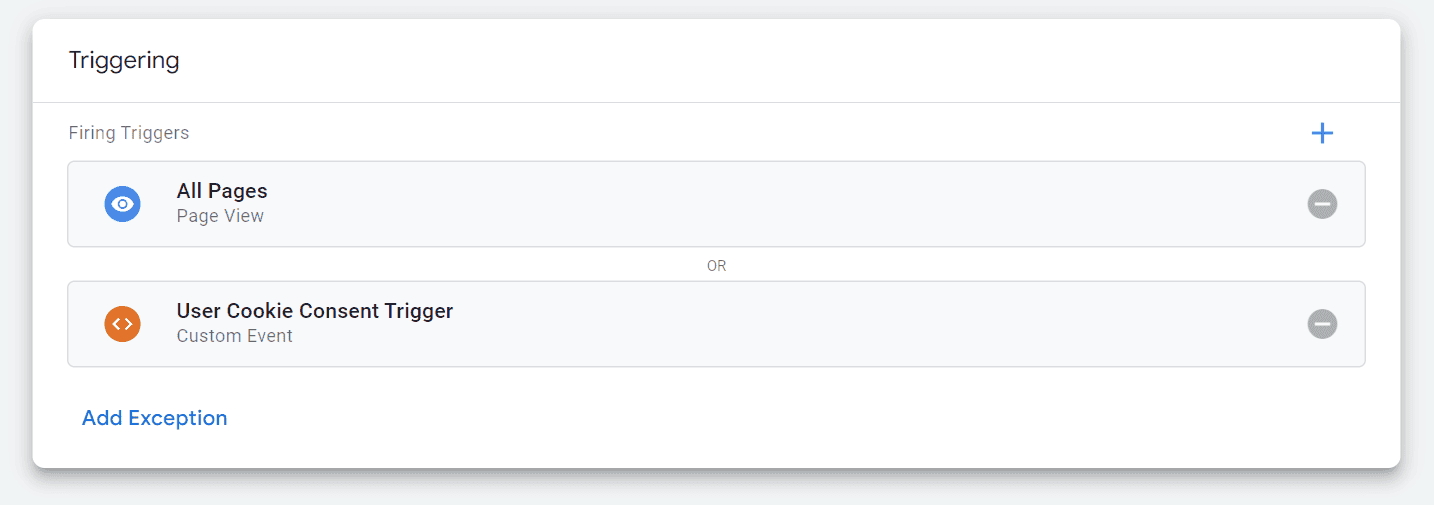
Under the “Triggering” section, add “All Pages” and the “wpcc_consent_update” trigger we created earlier. This will ensure the tag is fired if consent checks are passed and if the user makes changes to their consent preferences.
Save the changes once done.
Publish Your Changes
Once all configurations are complete, click “Submit” in the GTM workspace to publish your changes. This will activate the WebsitePolicies cookie consent banner on your website through GTM, ensuring that user consent preferences are respected before any non-essential tags are fired.
Setting Default Consent
By default only the “essential” consent category is granted for proper compliance which includes “functionality_storage” and “security_storage” .
If you want to change the default values, add this code in the <head>...</head> section of your website (above the Google Tag Manager code) to specify what you would like to allow or deny by default:
// Allowed values: "granted" or "denied"
var wpccGTMConsentDefault = {
	ad_storage: 'denied',
	analytics_storage: 'denied',
	functionality_storage: 'granted',
	personalization_storage: 'denied',
	security_storage: 'granted',
	ad_personalization: 'denied',
	ad_user_data: 'denied'
};

// Allowed values: true or false
var configCategoriesDefault = {
	'categories': {
		'essential': { 'enabled': true },
		'analytics': { 'enabled': false },
		'marketing': { 'enabled': false },
		'personalization': { 'enabled': false }
	}
};