This step-by-step guide will walk you through how you can create and add a personalized cookie consent banner for your Shopify store in minutes.
To begin with, sign up on WebsitePolicies or login if you already have an account.
Create a Cookie Consent Banner For Your Shopify Store
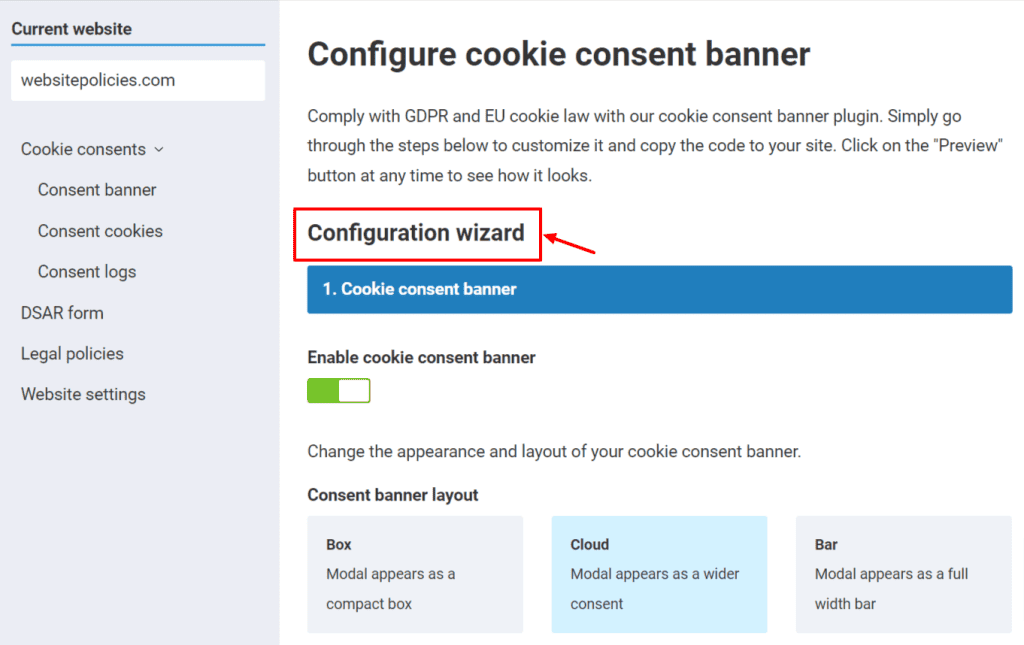
Step 1: From your dashboard, click on the “Cookie consents” dropdown button and choose “Consent banner.”

Step 2: Configure your cookie consent banner using the “Configuration wizard” feature where you can customize the appearance and layout of your banner.
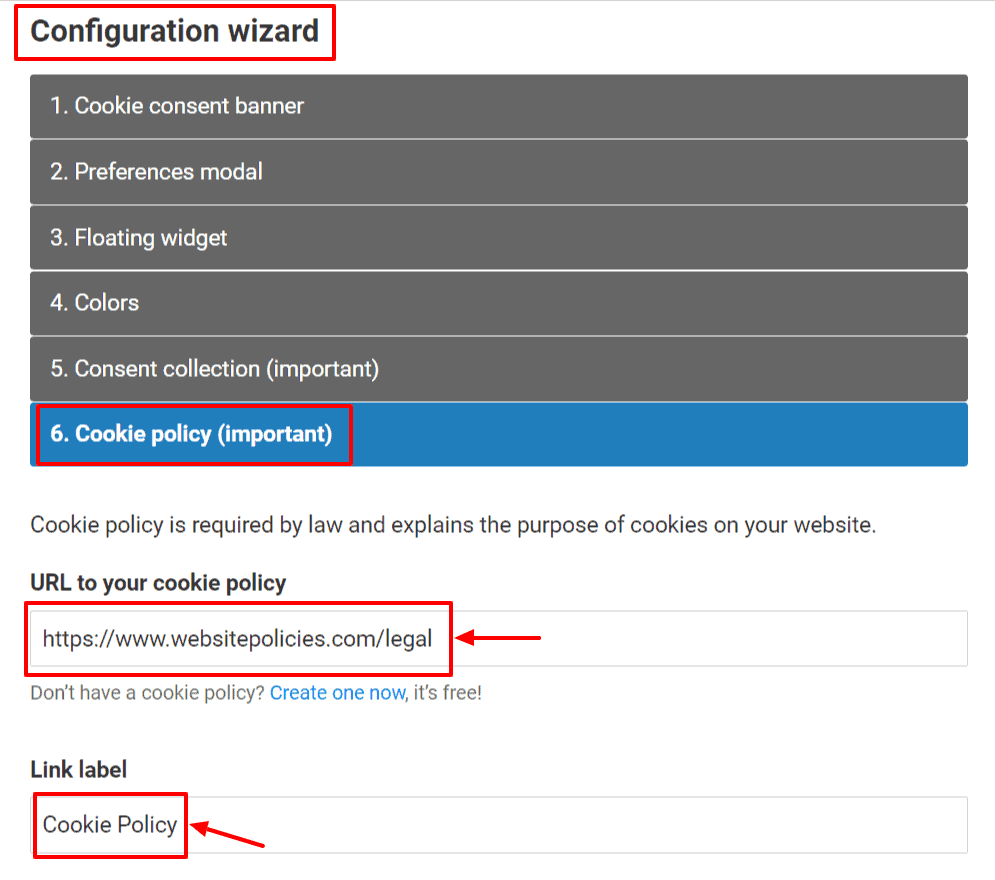
Step 3: Go to “Cookie Policy” under the “Configuration wizard.” Retrieve your website’s cookie policy link and paste it into the URL box. Then, type “Cookie Policy” into the link label box.
Step 4: Select “Preview” to check how your cookie consent banner looks on your page. Once done, click “Save” then select the “Add to my website” button.

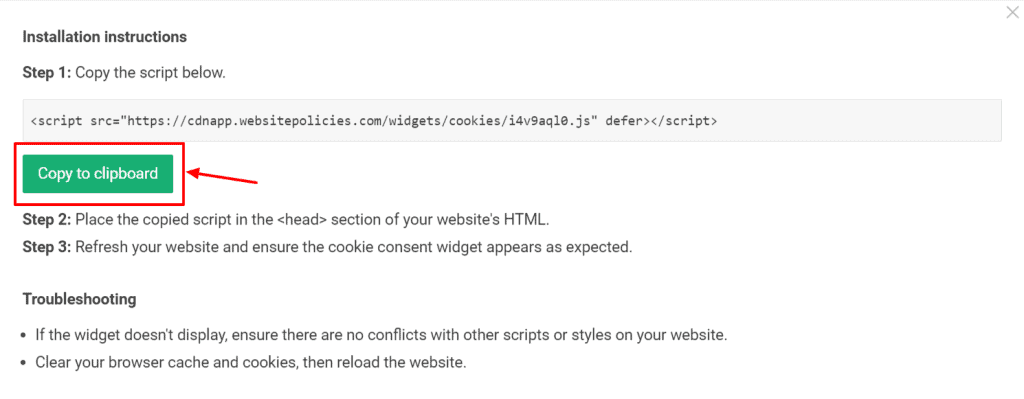
Step 5: Click “Copy to clipboard” to get the installation code and begin installing the cookie consent banner on your website.
Install a Cookie Consent Banner on Your Shopify Store
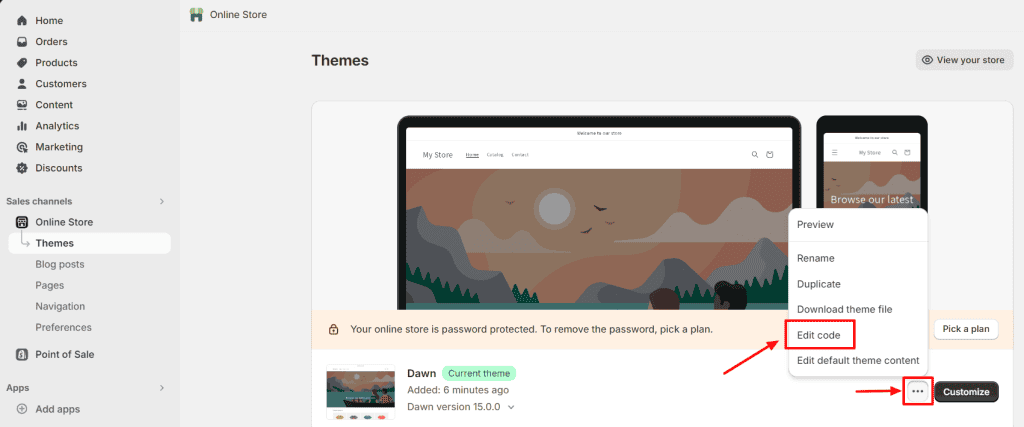
Step 1: Log in to your Shopify account. From your dashboard, go to “Online Stores” on the left panel under “Sales channels.” Click “Themes.”
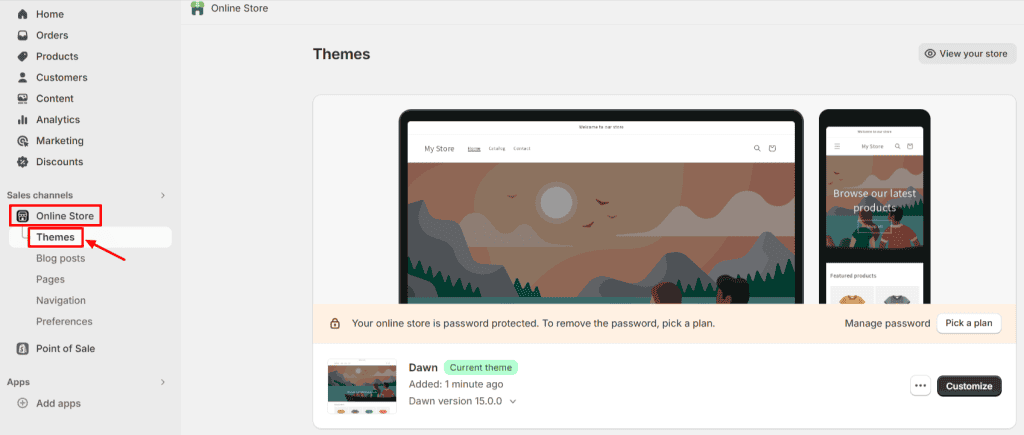
Step 2: Select the three dots on the layout theme beside the “Customize” button and choose “Edit code.”
Step 3: From the “Layout” section, click “</> theme.liquid” to open the HTML box.

Step 4: Paste the cookie consent banner’s installation code into the HTML box below the “<head>” tag and click “Save.”

Step 5: After saving the changes, refresh your website to see the cookie consent banner live on your Shopify store.
