This step-by-step guide will walk you through how you can create and add a personalized cookie consent banner for your WordPress site in minutes.
To begin with, sign up on WebsitePolicies or login if you already have an account.
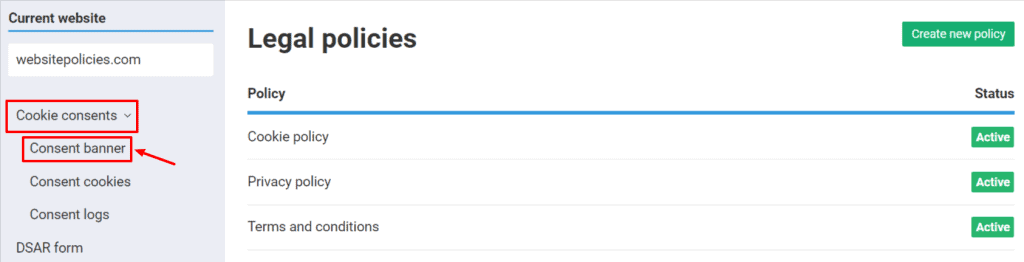
Create a Cookie Consent Banner For Your WordPress Website
Step 1: From your dashboard, click on the “Cookie consents” dropdown button and choose “Consent banner.”
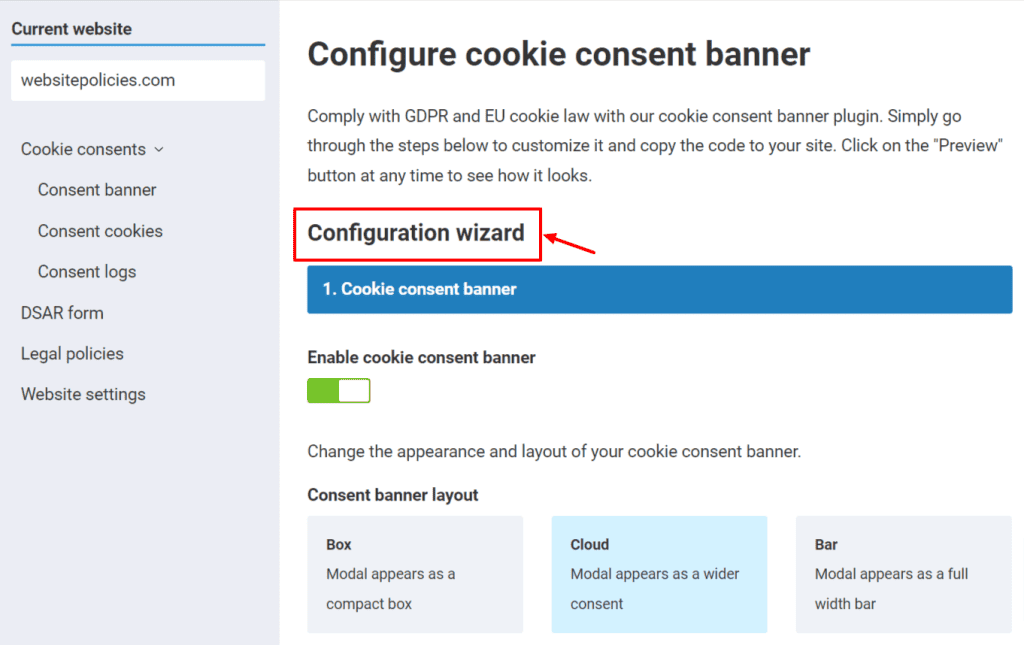
Step 2: Configure your cookie consent banner using the “Configuration wizard” feature where you can customize the appearance and layout of your banner.
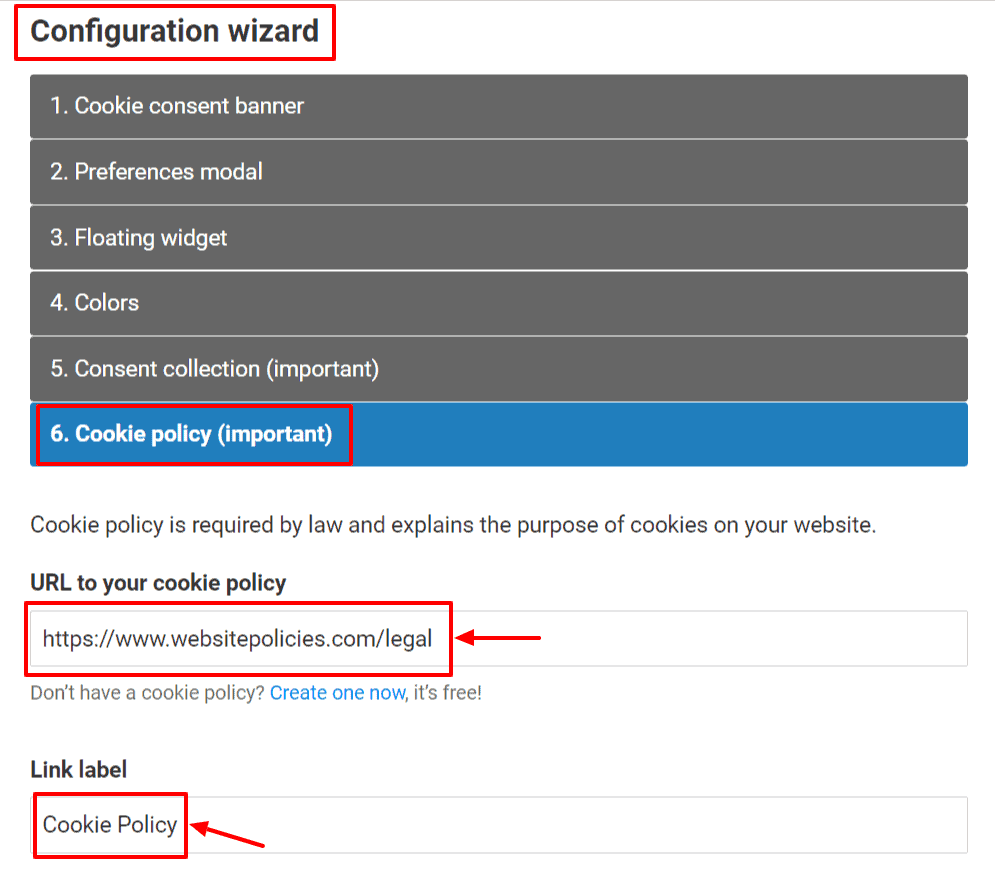
Step 3: Go to “Cookie Policy” under the “Configuration wizard.” Retrieve your website’s cookie policy link and paste it into the URL box. Then, type “Cookie Policy” into the link label box.
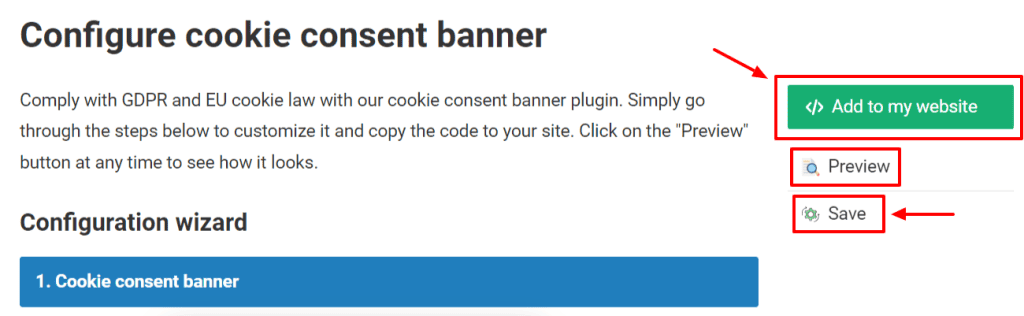
Step 4: Select “Preview” to check how your cookie consent banner looks on your page. Once done, click “Save” then select the “Add to my website” button.
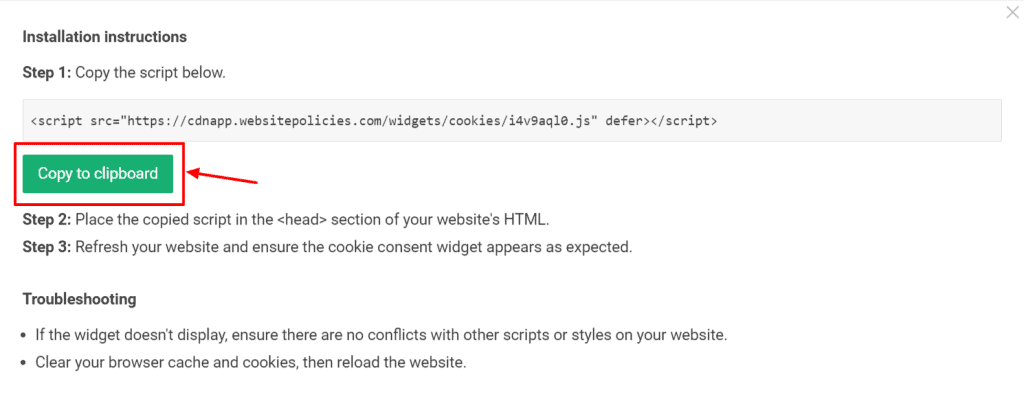
Step 5: Click “Copy to clipboard” to get the installation code and begin installing the cookie consent banner on your website.
Install a Cookie Consent Banner Via a Plugin
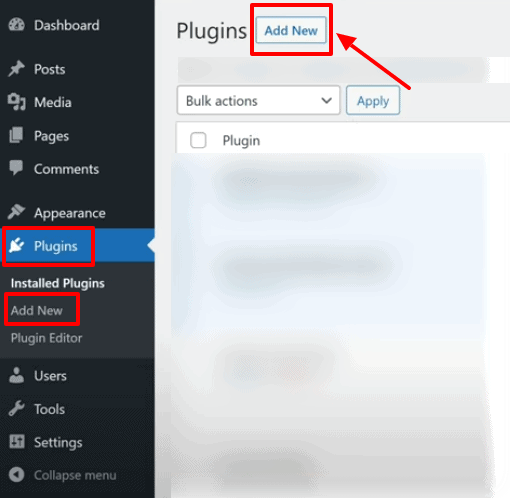
Step 1: Log in to your WordPress dashboard. On the left-hand menu, click “Plugins” and select the “Add New” button.
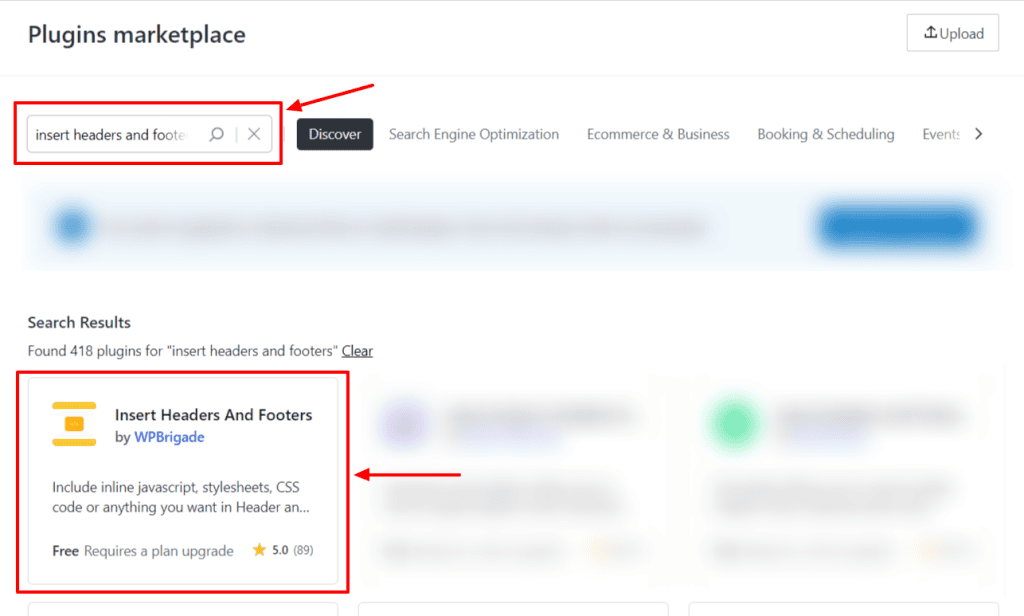
Step 2: In the search box, type “Insert Headers and Footers” and look for the plugin by WPBrigade. Once you find it, install and activate the plugin.
Step 3: After activation, go to “Settings” and select “WP Headers and Footers.” Paste the cookie banner consent installation code into the “Scripts in Header” HTML box.
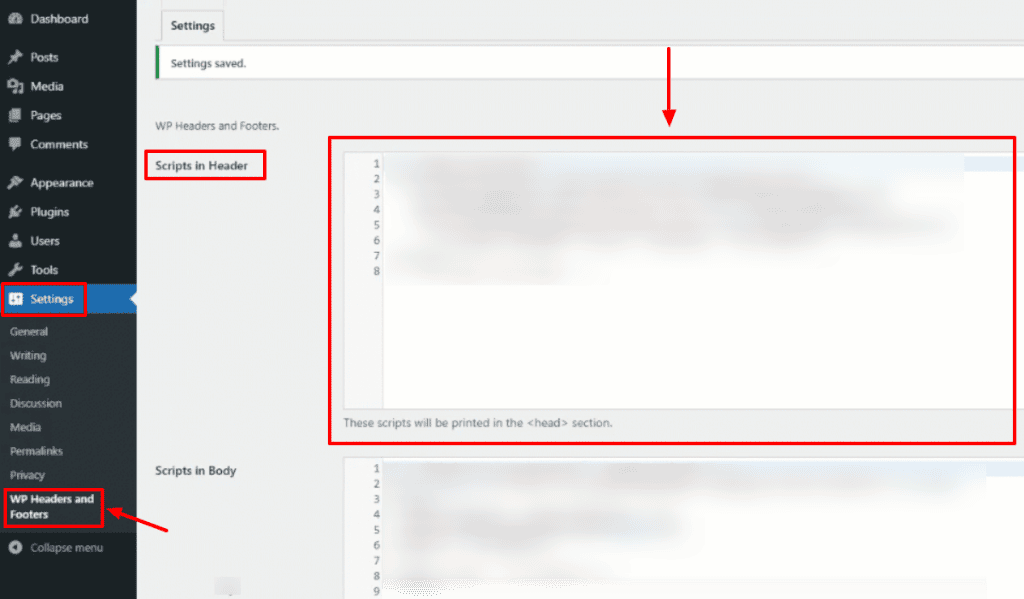
Step 4: Save the changes by clicking the “Save the Changes” button at the bottom of the page. Once done, refresh your website to see the cookie consent banner live on your WordPress site.
Install a Cookie Consent Banner by Editing Your Theme
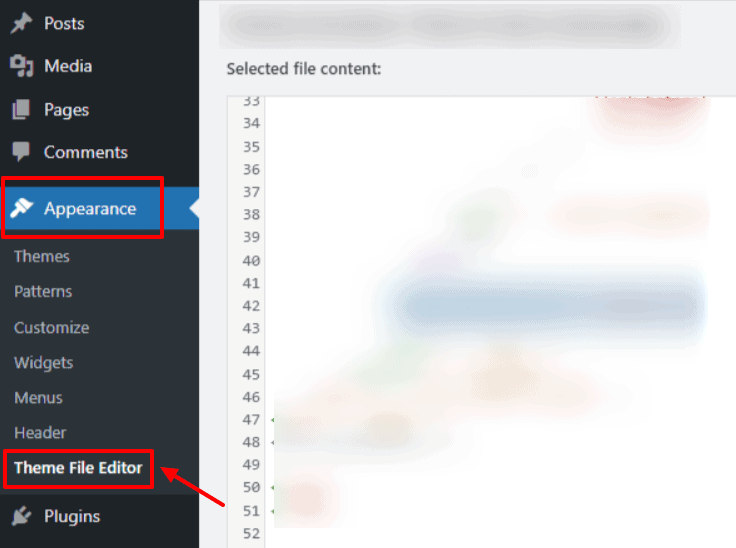
Step 1: Log in to your WordPress dashboard. On the left-hand menu, go to “Appearance” and click “Theme File Editor.”
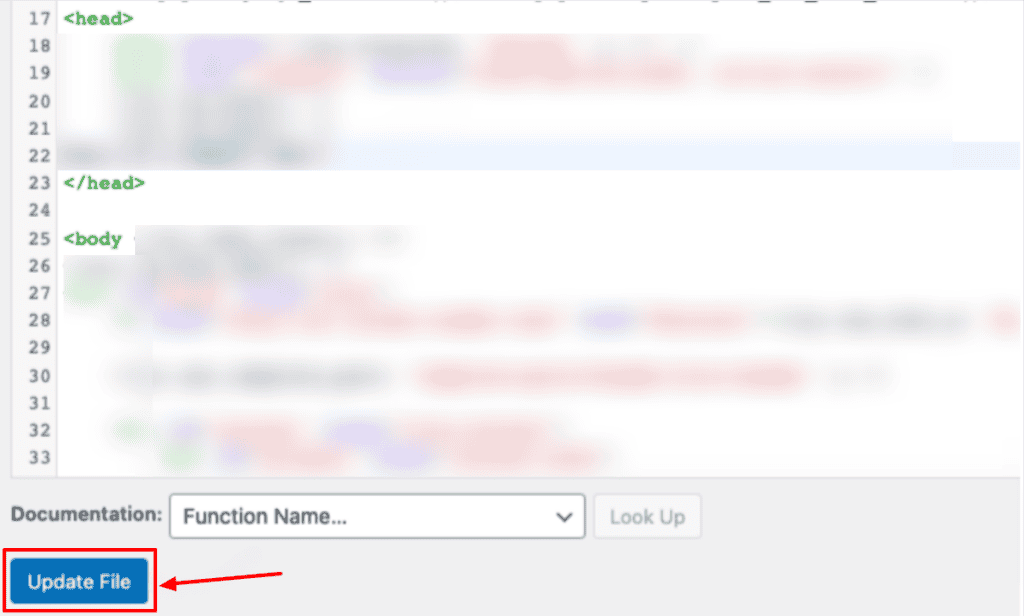
Step 2: From the editor page, select “Theme Header” on the right-hand panel. Paste the cookie consent banner’s installation code into the HTML box between the “<head>” and “</head>” tags.
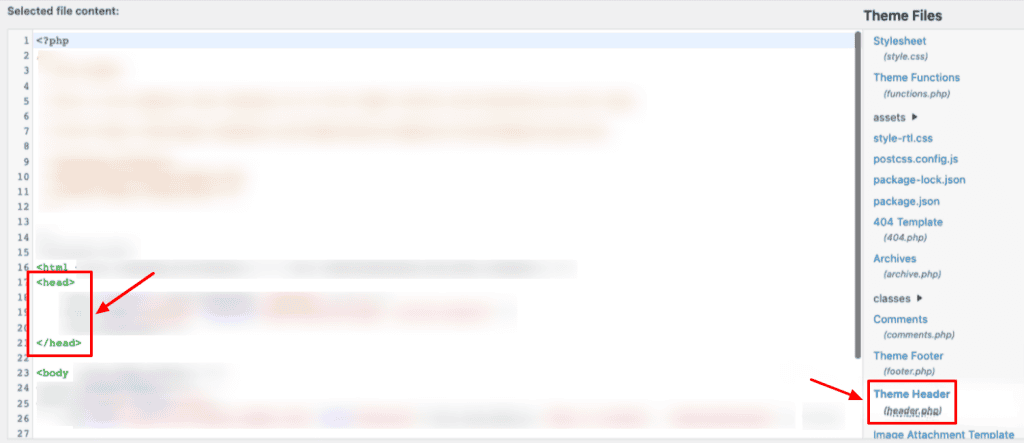
Step 3: Save the changes by clicking the “Update File” button at the bottom of the page. Once done, refresh your website to see the cookie consent banner live on your WordPress site.