This step-by-step guide will walk you through how you can create and add a personalized cookie consent banner for your website in minutes.
To begin with, sign up on WebsitePolicies or login if you already have an account.
Create a Cookie Consent Banner
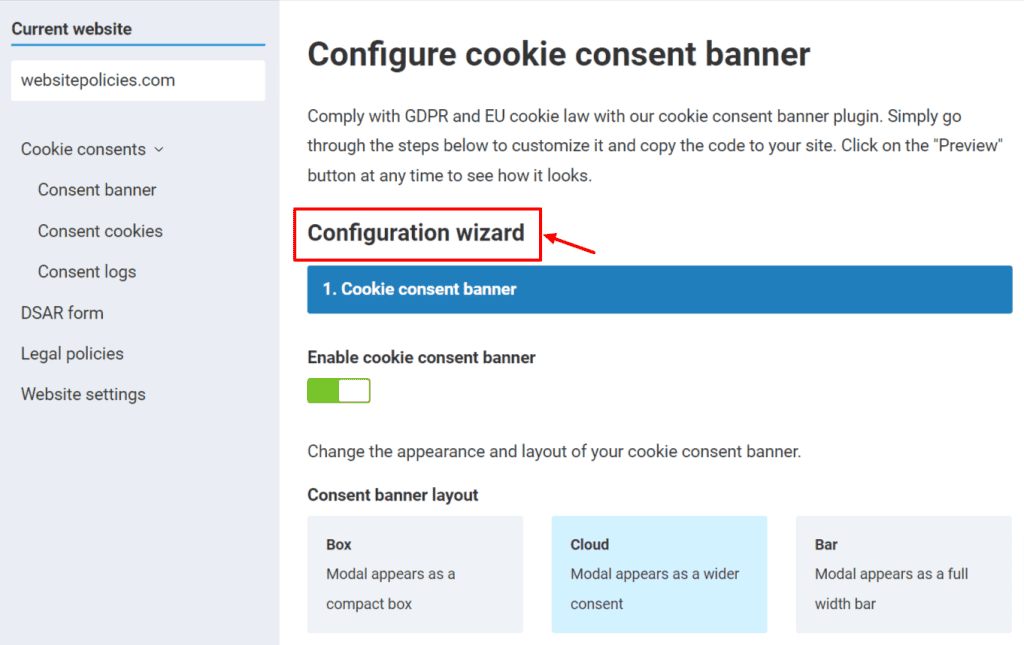
Step 1:In your dashboard, navigate to the “Cookie Consents” dropdown and select “Consent Banner.”

Step 2: Use the “Configuration Wizard” feature to set up your cookie consent banner, allowing you to personalize the appearance and layout to match your preferences.

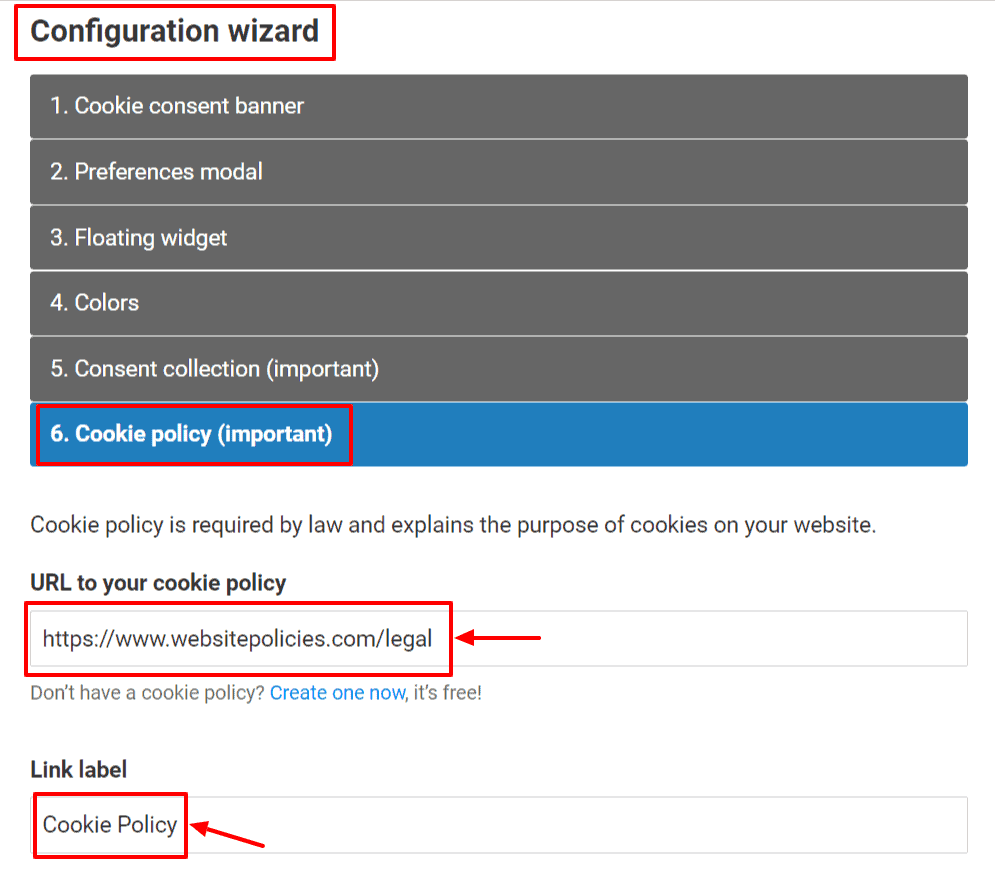
Step 3: Navigate to “Cookie Policy” within the “Configuration Wizard.” Copy your website’s cookie policy link and paste it into the URL field. Afterward, enter “Cookie Policy” into the link label box.

Step 4: Click on “Preview” to see how your cookie consent banner appears on your page. Once done, click “Save,” and then select the “Add to My Website” button.

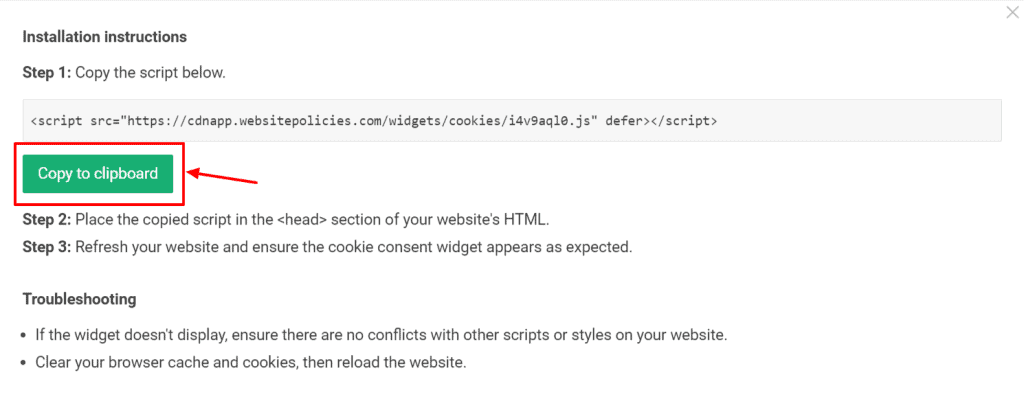
Step 5: Click “Copy to clipboard” to get the installation code to add to your website.

Add a Cookie Consent Banner to Your Website
Step 1: Open the HTML source of your website that includes the <head>...</head> tags. This can be done either by editing your files from the administrator panel of your website, hosting control panel file manager, or FTP manager. If you’re not sure how to edit your website’s file, it’s best to contact your hosting or service provider for assistance.
Step 2: Paste the cookie consent banner code you copied earlier right above the </head> tag.

Verify the Installation:
After embedding the code, save your changes and refresh your website in a browser. The cookie consent banner should now be visible at the top or bottom of your website, depending on your chosen configuration.
