This step-by-step guide will walk you through how you can create and add personalized terms and conditions for your Wix page in minutes.
Though the terms and conditions page is not legally required, it’s highly recommended because it provides legal protection and sets out guidelines for how your users should interact with the site, thereby reducing potential liabilities and safeguarding the website’s interests and intellectual property.
To begin with, sign up on WebsitePolicies or login if you already have an account.
Table of Contents
Create Terms and Conditions For Your Wix Website
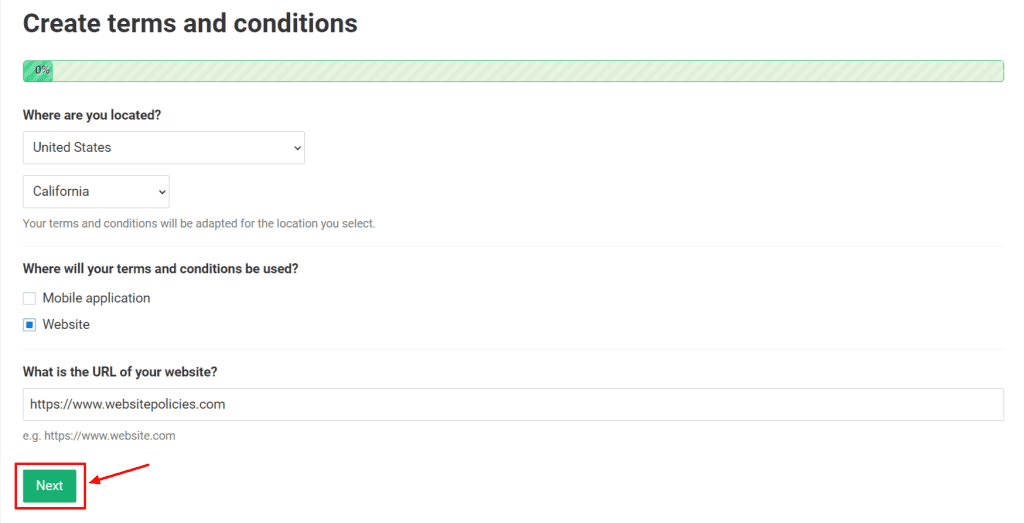
Step 1: From your dashboard, click on the “Create new policy” button and choose “Terms and conditions.”

Step 2: Start filling out the questionnaire and click “Next” to continue to the next set of questions to complete creating your terms and conditions.
Step 3: Once the terms and conditions is generated, click on the “Add to my website” button. You may also customize the policy’s appearance and add custom clauses if you prefer before adding it to your site.
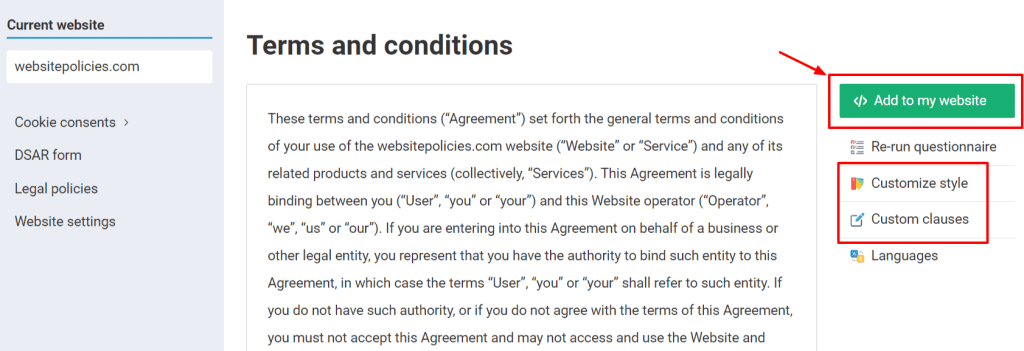
Step 4: Choose from the available options to add terms and conditions to your Wix website.
Embed Terms and Conditions on Your Wix Website
Step 1: Go to your Wix dashboard and select the website you want to add your terms and conditions to. Click on “Edit Site” then go to the “Pages & Menu” area on the left-side panel.

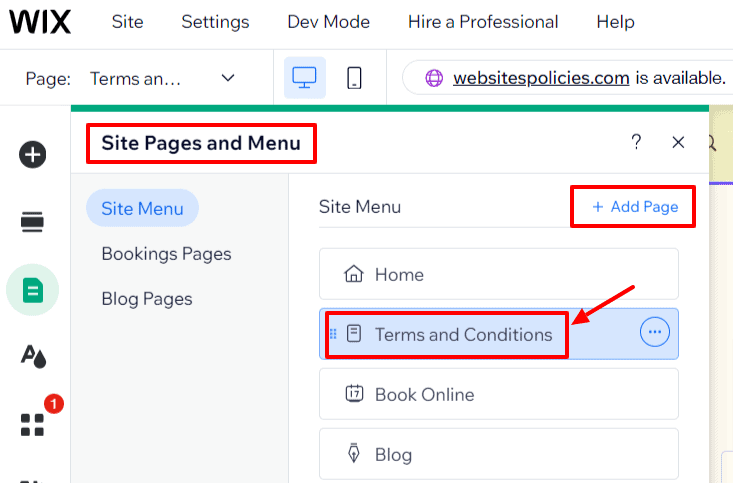
Step 2: Choose “Site Menu” and create a new page by selecting “+ Add Page” and then “+ Blank Page.” Name it “Terms and Conditions.” You can also choose an existing page where you wish to display your policy.

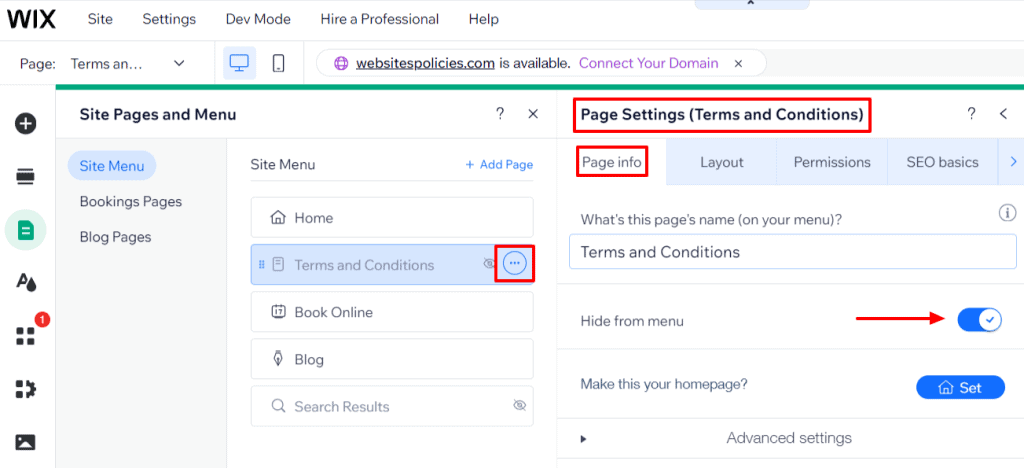
Step 3: Tap the three dots to access the “Page Settings” menu. In the “Page info” section, toggle “Hide from menu” to activate it. Then, close “Page Settings” to access the newly created page.
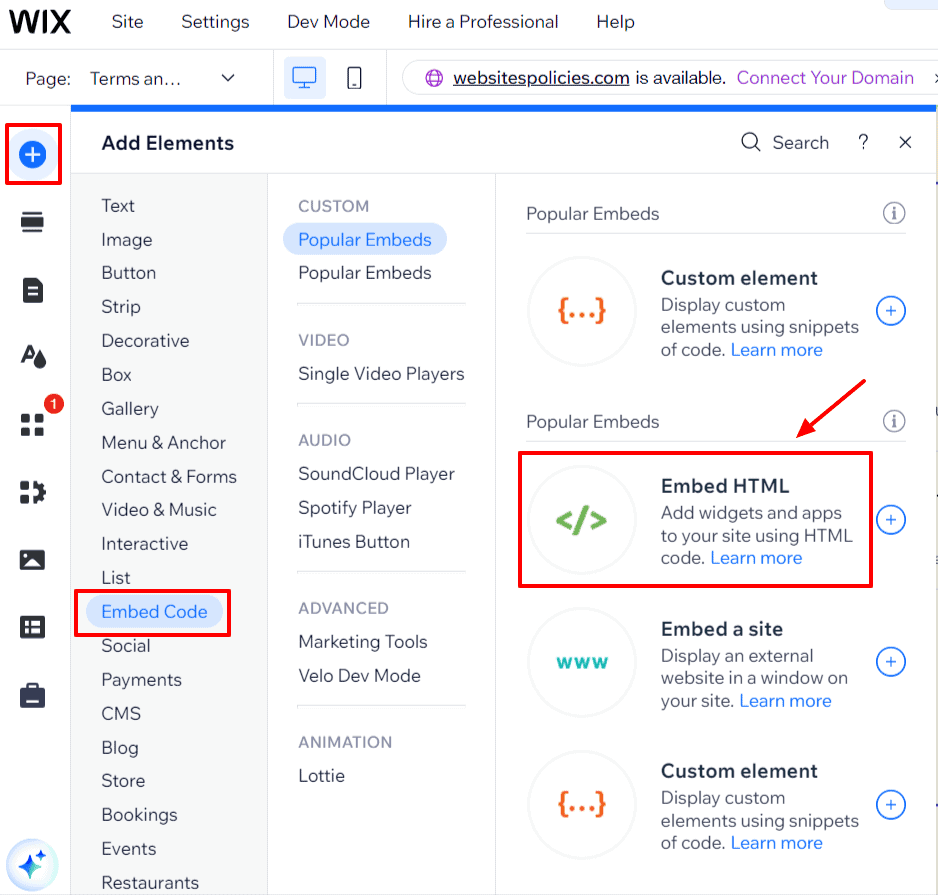
Step 4: While on the page, navigate to the “Add Elements” feature on the side panel. Select “Embed Code” from the options, then choose “Embed HTML.”
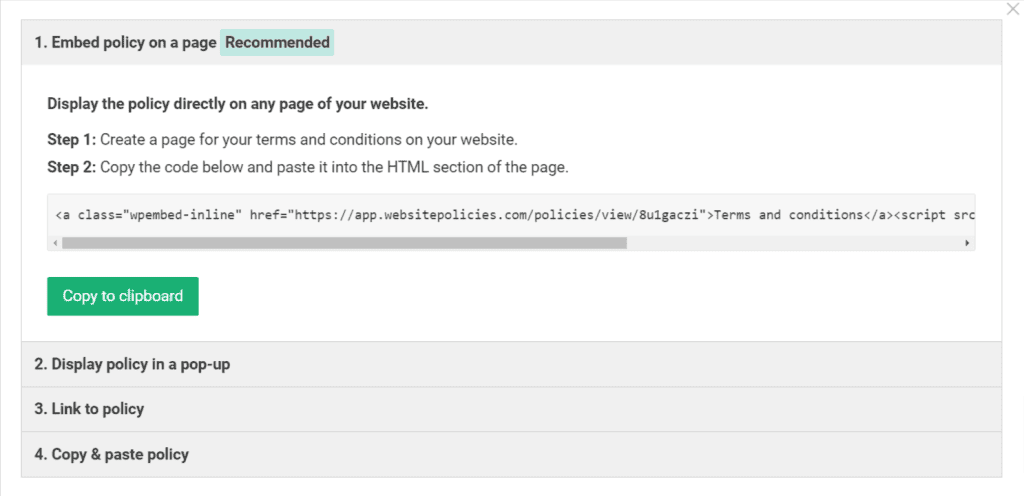
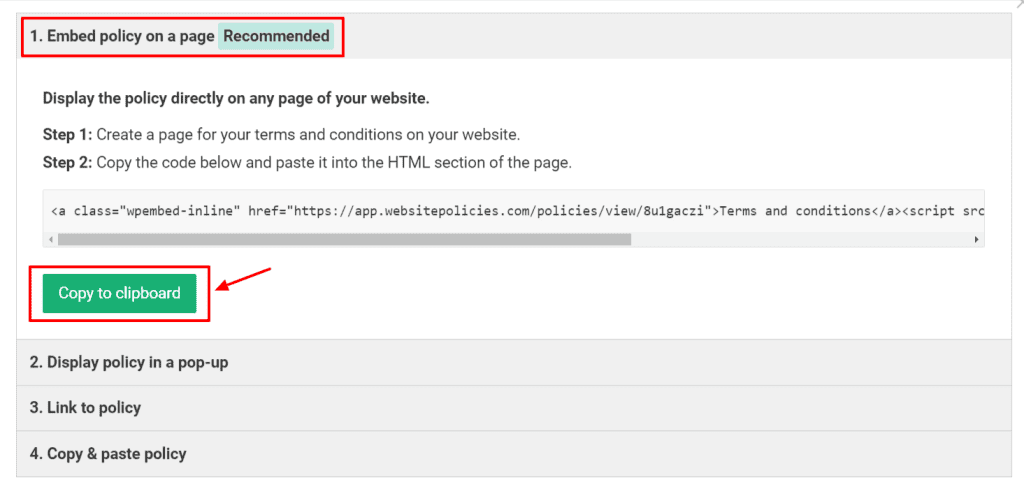
Step 5: Retrieve your terms and conditions and copy the code located under “1. Embed policy on a page” by clicking the “Copy to clipboard” button.
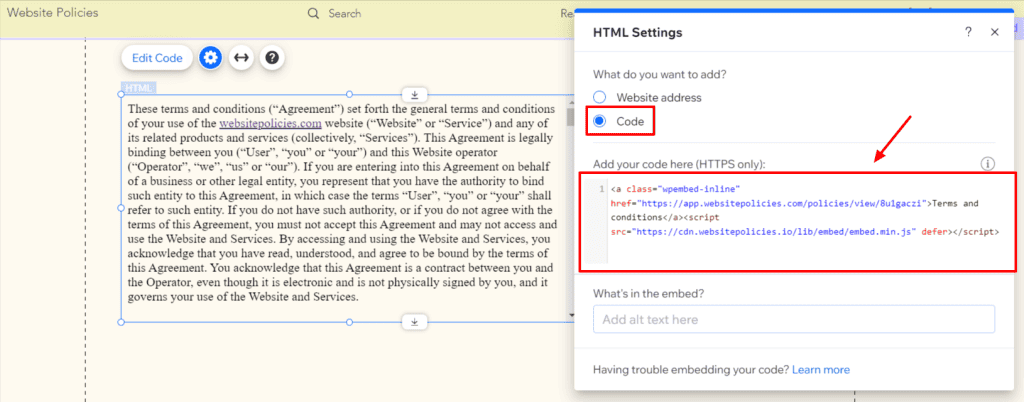
Step 6: Return to the Wix Editor. While on “HTML Settings,” paste the code into the box and click “Update” to save the changes.
Link to Terms and Conditions From Your Wix Website
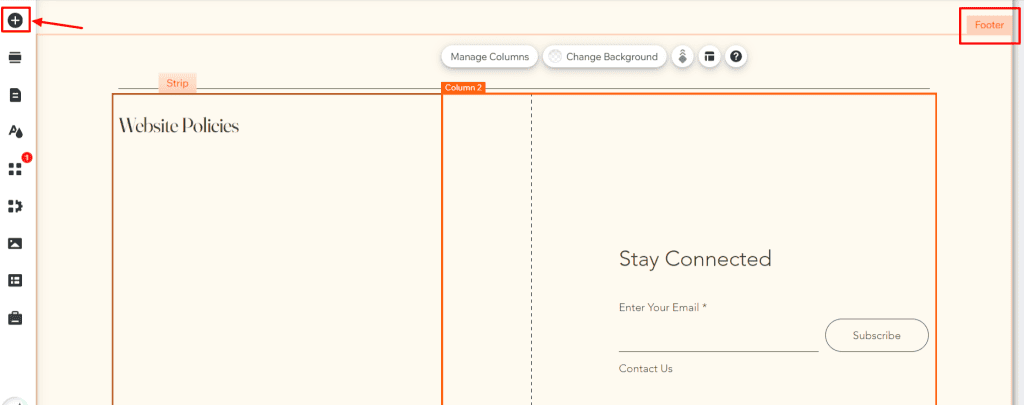
Step 1: In the Wix Editor, navigate to the bottom of your homepage and click the “+” icon to add additional elements to your “Footer.”
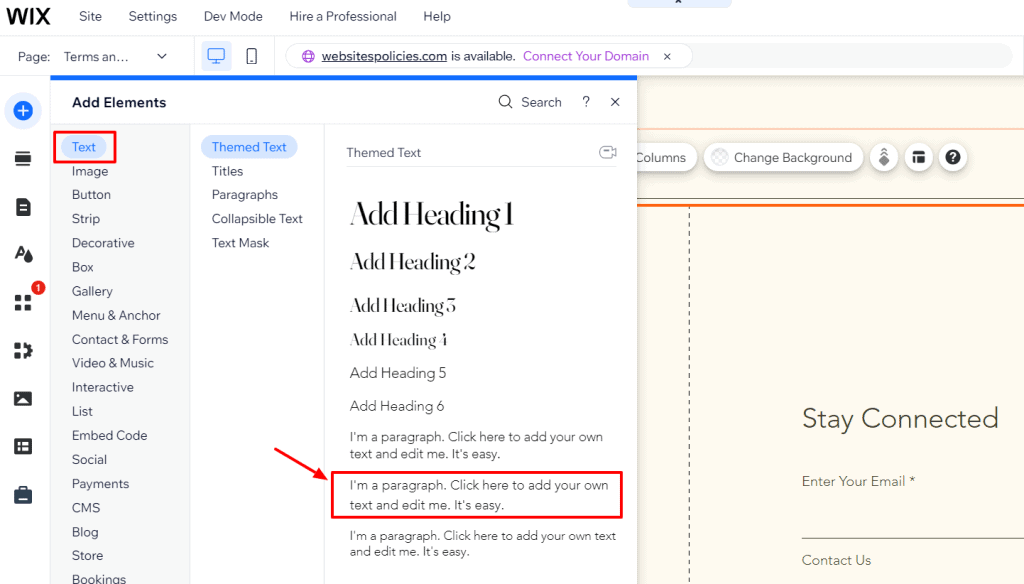
Step 2: In the “Add Elements” feature, select “Text,” then choose “Themed Text” to pick a style you want to use for your Footer.
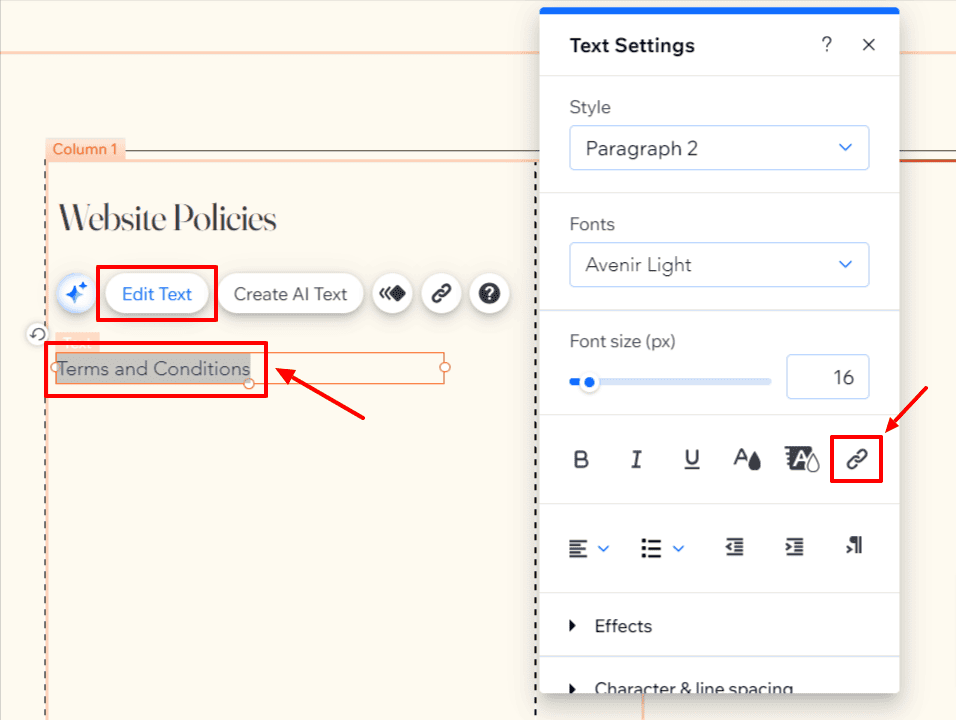
Step 3: Once you’ve added the text box to the Footer, double-click it to edit the text to “Terms and Conditions.” Then, select the text box and click the “link” icon in the “Text Settings.”
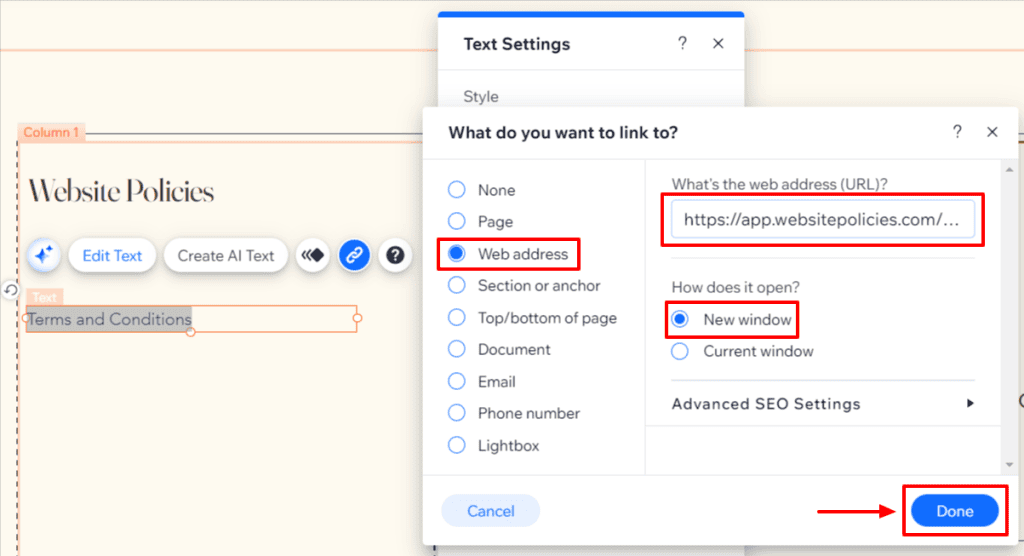
Step 4: Go back to your terms and conditions, then select the “3. Link to policy” section. Click “Copy to clipboard.”

Step 5: Return to the Wix Editor and insert the link into the designated “Web Address” field in the “Text Settings” menu. Be sure to choose “New window” and click “Done.”
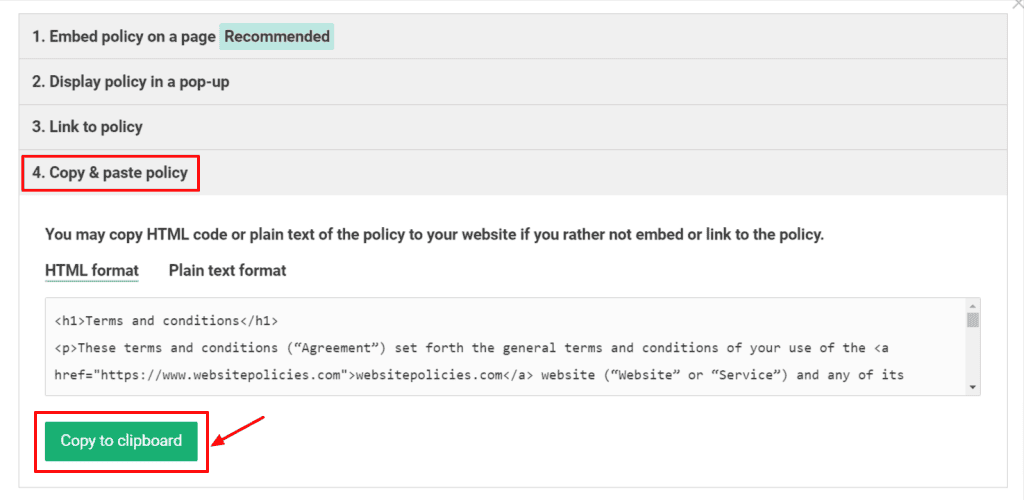
Copy & Paste Terms and Conditions to Your Wix Website
Step 1: Go to your Wix dashboard and select the website you want to add your terms and conditions to. Click on “Edit Site” then go to the “Pages & Menu” area on the left-side panel.

Step 2: Choose “Site Menu” and create a new page by selecting “+ Add Page” and then “+ Blank Page.” Name it “Terms and Conditions.” You can also choose an existing page where you wish to display your policy.
Step 3: Tap the three dots to access the “Page Settings” menu. In the “Page info” section, toggle “Hide from menu” to activate it. Then, close “Page Settings” to access the newly created page.

Step 4: While on the page, navigate to the “Add Elements” feature on the side panel. Select “Text” from the options, then choose “Paragraphs” to add a text box.

Step 5: Retrieve your terms and conditions and copy the code located under “4. Copy & paste policy” by clicking “Copy to clipboard.” You can also choose between “HTML format” or “Plain text format.”
Step 6: In the Wix Editor, click the text box you added to open the “Text Settings” menu. Select “Edit Text” and paste your terms and conditions into the text box.
